

In October 2013 I started a medallion quilt without a fully formed pattern or plan. As each border was added I recorded the basic instructions for the cutting and any helpful references just in case I happened to love the finished quilt enough to remake it, or just in case any of you would like a wee helping hand towards your own medallion quilt.
This quilt top will finish at 62.5" square.

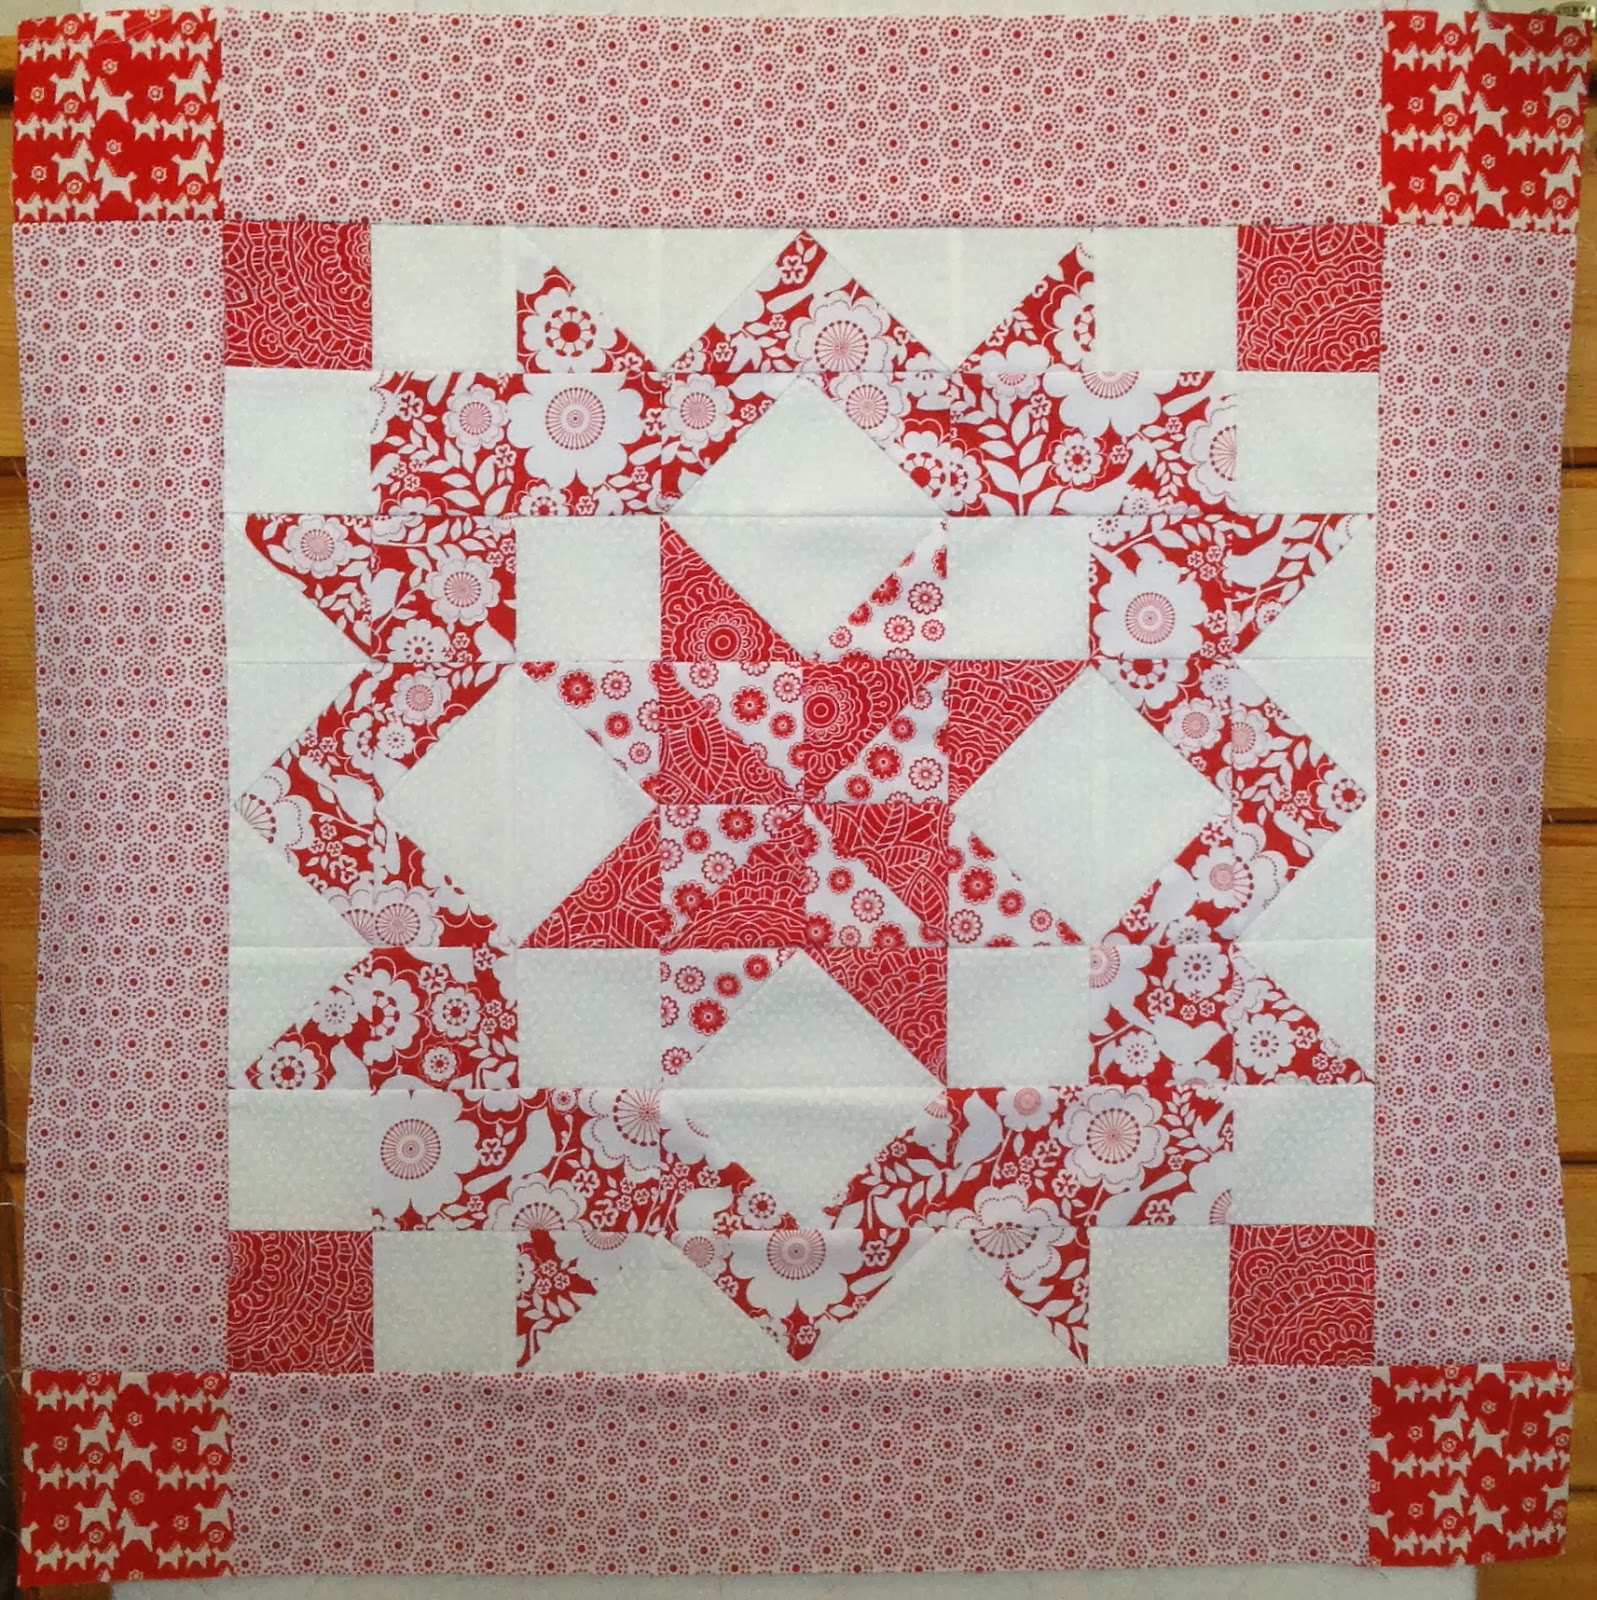
Medallion Centre - 18.5" unfinished (originally blogged here)
I used Little Miss Shabby's Supersized Quilt-A-Long Morning Star Pattern. There are three other gorgeous 18" finished stars in the Quilt-A-Long which would be lovely alternatives to the Morning Star I used here.
 |
Border 1 - bringing whole size up to 24.5" unfinished (originally blogged here)
Simple single fabric border with contrasting cornerstones.
Cut 4: 3.5" squares for cornerstones.
Cut 4: 3.5" x 18.5" rectangles for border pieces.

Border 2 - bringing unfinished size up to 32.5" square (originally blogged here)
40 flying geese pieced into 8 units of 5 geese each
8 square in a square blocks
8 square in a square blocks
For the flying geese:
Cut 80: 2.5" squares background fabric
Cut 40: 2.5" x 4.5" rectangles from print fabrics
For the square in squares:
Cut 8: 3 3/8" squares for centres
Cut 16: 3 3/8" squares background fabric for corners. Cut these squares once on the diagonal to give the required 32 corner triangles.
Using these measurements should give you a generous block of approx 5" square which you should them trim evenly to 4.5" square. Measurements for these square in a squares were helpfully published on Quiltville.com. The size chart at the bottom is a useful reference to measurements for other sized square in a square blocks too.
The square in a squares were positioned at each corner and in the centre of the borders between the sets of 5 flying geese.


Border 3 - bringing unfinished size up to 36.5" square (originally blogged here)
Single fabric border with contrasting cornerstones.
Cut 4: 2.5" squares for cornerstones
Cut 4: 2.5" x 32.5" for border strips
Border 4 - bringing unfinished size up to 48.5" square (originally blogged here)
Make 16 paper pieced 6" (finished) tippecanoe blocks
Make 16 bordered rectangle blocks (block will measure 4.5" x 6.5" unfinished)
For the tippecanoe blocks:
Make 16: I searched online for a tippecanoe paper piecing template that would give me a 6" block, but I couldn't find one, so I had to draw my own. It wasn't as bad as it sounds though because I found that papersnake.com has a free downloadable quarter inch grid paper. This made drafting the quadrants of the tippecanoe very simple, but if you give it a go, just check that the paper prints to exactly quarter inch grids before steaming ahead and stitching up blocks. Pic below shows how to draw the quadrant with a quarter inch seam allowance if you feel like having a go:

Draw a square 12 x 12 squares on the paper. This is your 3" block (check the measurement, don't proceed if it's not 3"). The little triangle area marked 1 on the photo is marked across the corner 6 squares along on each of the two adjacent sides. Drawing lines from these points of the triangle down to the bottom corner of the whole square will give you the sections for 3 and 4 also. Finally, draw a border of 1 square width all the way around your 3" square and this will give you a quarter inch seam allowance all the way round. Your entire drawing should now measure 3.5" square. Hope that made sense.

If you squeeze 4 quadrant patterns on to one page of the papersnake quarter inch grid paper you will be able to photocopy it 16 times to yield the template for your 16 blocks. To do this you need to draw all the way to the edge of the printed grids as you can see above. The bottom drawings fit within the gridded paper except for the bottom quarter inch seam, but that's easy enough to draw on manually measuring with a ruler. Getting four on one page really helps with the photocopying.
For the bordered rectangles:
Cut 16: 2" x 2.5" rectangles for centres
Cut 32: 2" x 2.5" rectangles for borders
Cut 32: 2" x 6.5" rectangles for borders
Position a tippecanoe block at each corner and alternate 4 bordered rectangle blocks with a further three tippecanoes along each side.

Border 5 - bringing unfinished size up to 50.5" square (originally blogged here)
Single border with contrasting cornerstones.
Cut 4: 1.5" squares for cornerstones
Cut 4: 1.5" x 48.5" for border strips (using 5 strips 1.5" x FWOF pieced together should give you enough to cut the four required lengths from)

Border 6 - bringing finished size up to 62.5" square (originally blogged here)
Make 4 sets of checkerboard borders - each one is 3 rows of 25 2.5" squares
Make 4 Le Moyne Star blocks for the cornerstones - each block 6.5" unfinished
For the checkerboard borders:
Cut 148: 2.5" squares white fabric
Cut 152: 2.5" squares red prints
Layout squares in desired pattern and stitch to form 4 border units of 3 rows x 25 squares each.
For the Le Moyne Star blocks:
Make 4 blocks. Download and print templates for paper pieced Le Moyne Star blocks (6.5" unfinished blocks) - http://cre8tivequilter.blogspot.co.uk/2010/09/block-of-week-block-36-lemoyne-star.html Take care to check the patterns are the correct size when printed. You may need to turn off your scaling or adjust it to 100% to get it to print exactly.
Add a Le Moyne Star block to each end of the top and bottom borders. Stitch the side checkerboard borders on first and then finish by adding the top and bottom borders to your quilt top.
Now your 62.5" square quilt top is ready for you to baste and quilt as desired.
This is lovely! Your center medallion and borders look wonderful. I am enjoying seeing your mystery medallion grow. Thanks for the how-to's ... :) Pat
ReplyDeleteI was looking for border ideas for a round robin my guild is doing, and came across your lovely quilt. Thanks for posting the instructions for each round.
ReplyDeleteBeautiful!
ReplyDelete